• Skip to main content
  • Skip to footer

eSAIL

Engineering Studio for Advanced Instruction & Learning

  • Home
  • Faculty Services
    • Course Design
    • Canvas Support
    • Faculty Learning
    • Mediasite
    • Helpful Tools
  • Faculty Learning
    • Faculty Learning
    • Online Teaching Tips
    • Digital Accessibility Resources
    • Accessibility Series
    • Tutorials
    • Online Courses
    • Live Workshops
    • Webinars
    • Frequently Asked Questions (FAQ)
  • Contact
    • Contact Us
    • About Our Team
    • eSAIL’s Research Activities
    • Physical Location
    • Subscribe to our Newsletter
    • Website Feedback
Home » Faculty Tutorials » Accessibility » Making Handwritten Lecture Notes Accessible

November 4, 2025 By Lani Draper

Making Handwritten Lecture Notes Accessible

This step-by-step guide is for faculty who want to convert handwritten lecture notes into accessible versions in Microsoft Word or PDF formats using MathPix. This is especially crucial for STEM-focused courses (Science, Technology, Engineering, and Mathematics) to ensure all students, including those with visual impairments, can access complex mathematical notation. This instruction set assumes you already have your handwritten notes scanned into a PDF. The primary conversion tool, MathPix Snip, is available for purchase by individuals.

Step 1: Create a Free Trial MathPix Account 📝

  1. Open the MathPix website: https://mathpix.com/.
  2. In the top right corner, click the blue “Try for free” button.
    MathPix homepage with the blue "Try for free" button highlighted in the top right corner.
  3. Under the ‘Log in’ box, click “Sign up”.
    MathPix login dialog box with the 'Sign up' link highlighted in red at the bottom.
  4. Fill out the required information in the ‘Sign up’ box, then click “Sign up”.
    MathPix "Sign up" form filled out, showing email and password fields, terms and conditions agreement, and a red box highlighting the blue "Sign up" button at the bottom.
  5. Check your email and verify your account.

Step 2: Upload Your PDF and Export as DOCX ⬆️

  1. Log into MathPix.
  2. Under the Snip Webapp, click “Launch app”.
    A screenshot of the Mathpix Accounts "Quickstart" page with a red box highlighting the "Launch app" button under the "Snip Webapp" section.
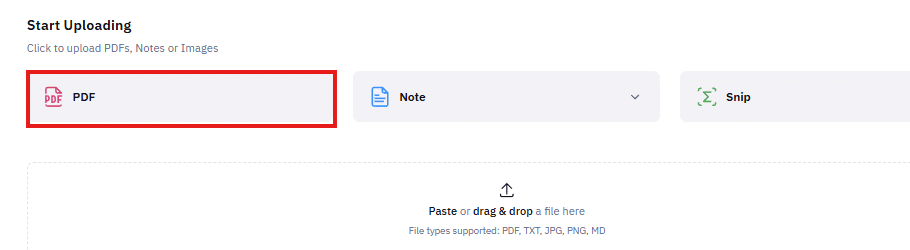
  3. On the Mathpix Home Page, click PDF.
    A screenshot of the Mathpix "Start Uploading" page. It shows three primary tabs: PDF, Note, and Snip. A red box highlights the "PDF" tab, which is currently selected.
  4. In the pop-up dialogue box, select your PDF and then click “Upload”.
    A dialog box titled "Upload PDF" is shown. The box displays options for a file named "L17 - Mass Momentum Flux Radiatiu". The input fields are set to: Page Ranges (with the value "1,3,8,-25,80,-10,-8,-5,-1"), Section Numbering ("Preserve"), and Equation Numbering ("Preserve"). At the bottom right, there are Cancel and Upload buttons, with the Upload button highlighted by a red box.
  5. In the menu on the left side, click on your newly uploaded file.
  6. In the top right, click the export icon and export the file as a DOCX.
    A screenshot shows a dropdown menu labeled "EXPORT PDF AS" within a web application interface. The menu lists several export formats including Original PDF, Markdown, Mathpix Markdown, DOCX, LaTeX, HTML, PDF (with HTML), PDF (with LaTeX), and Overleaf. A red box highlights the DOCX option, which has a Microsoft Word icon next to it.

Go to top


Step 3: Use Microsoft Word to Edit for Accuracy and Accessibility ✏️

  1. In Microsoft Word, open the new DOCX file. You must compare the Word document with the original PDF to make necessary corrections and ensure it’s accessible.
  2. Compare the new Word document with the original file and Correct as needed.
    • Edit text for accuracy.
    • Edit math notation using the Microsoft Word Equation Editor.
    • Check the order of diagrams and figures in relation to the surrounding text and math notation.
  3. Ensure the Document’s Accessibility by Running the Accessibility Checker:
    • In the “Review” tab, click on Accessibility Checker, or type “accessibility checker” in the search bar.
      screenshot of the Microsoft Word ribbon, specifically the Review tab. A red box highlights the "Check Accessibility" button under the "Accessibility" group.
    • Review the results in the Accessibility Checker panel. You may need to:
      • Add alt text or long descriptions to all figures.
      • Add a logical hierarchy of headings using “Styles” (the document title should be a Heading 1).
  4. Add a Document Title (Metadata):
    • From the “File” menu, select Info.
    • Click on the “Properties” dropdown, then click on “Advanced Properties”.
      A screenshot of the Microsoft Word Info menu showing the document properties for a file titled "L17 - Mass Momentum Flux Radiation Stress Setup." A red box highlights the "Advanced Properties" link in the right-hand "Properties" panel.
    • Add a descriptive Title in the pop-up box. This should not be the file name.
      A dialog box titled "L17 - Mass Momentum Flux Radiation Stress Setup..." showing the Summary tab of the Advanced Properties for a document. A red box highlights the empty "Title" input field at the top of the form.
Note: For more information, please review How to Create an Accessible Word Document.

Go to top


Step 4: Export Lecture Notes to Accessible PDF (Optional) 💾

Note: You can skip this step and share the Word document with your students in Canvas, as it is already accessible. If you decide to convert your Word document, review How to Convert a Word Document to an Accessible PDF for more details.
  1. In Word, from the File menu, select “Save As”.
  2. Choose your save location and click Save.
  3. You now have a portable PDF file ready to share with your students.

Go to top


Step 5: Check Accessibility in Canvas with Ally or Panorama ✅

  1. Use Ally or Panorama to check the accessibility score of your newly converted Word or PDF document within Canvas.
  2. If further changes are required, it’s always best practice to make corrections in the original Word document, then re-upload and replace the previous version.

Go to top


Conclusion

By following these five steps, faculty at Texas A&M and beyond can ensure their handwritten lecture notes, especially those containing complex math, are not only accurate but also fully accessible to all students. This commitment supports a more inclusive learning environment.

Filed Under: Accessibility

Previous Post: « How to Make LaTeX Documents Accessible
Next Post: Generating and Applying Long Descriptions of Complex Images »

Reader Interactions

Leave a Reply Cancel reply

Your email address will not be published. Required fields are marked *

Texas A&M University Engineering

Footer

About Our Team

Our team is comprised of individuals with development, video producing, accessibility, writing, and learning/teaching expertise – all ready to partner with faculty...
Meet eSAIL Team Members!

Contact

Online Course & Mediasite Support
eSAIL@tamu.edu
We'd love to hear from you!
Contact Us

Quick Links

  • Site Map
  • Website Feedback
  • Submit Website Issue
  • State Links & Policies

Site Search & Subscribe

Get tips each quarter to make each semester more successful than the last!
Subscribe to our Newsletter

© 2025 · Texas A&M University · All Rights Reserved · Log in